If you are a local service business or sell through relationships, but don’t have a Facebook public figure page, you’re missing a CRITICAL component.
Why a Public Figure Facebook Page?
Your personal brand is your most valuable asset. If people begin to see you as an authority in your field, you won’t have to reach out to get customers; they’ll come to you.
One of the best tools for growing your personal brand is a Facebook public figure page. In addition to looking more official, a public figure page offers these advantages over a personal profile:
- Earn page likes to provide proof of authority.
- Get detailed insights on how your page is performing.
- Run ads to promote your content.
Remember, personal branding comes from expertise in your field. If you don’t have something to teach, you won’t get engagement.
To effectively use a public figure page for personal branding, you need to specialize in something. It’s fine if you don’t know everything about your chosen topic now; just make sure you’re willing to learn and that your specialty relates to your overall goal.
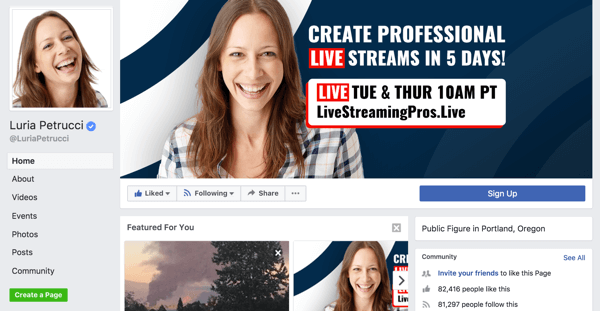
If you’re wondering what to sell on your public figure page, the answer is, well, nothing. You don’t need to have a product ready; you just need to have content to deliver and a personal brand to grow. Build your brand now so that when you do have a product to sell, people will trust you enough to buy.
Do I Need a Facebook Public Figure Page if I Already Have a Business Page or Personal Profile?
A business page promotes what you sell, while a public figure page shows who you are. Most people in business should have both types of pages; exceptions may be realtors, freelancers, or artists who use their individual name as a professional title and already have a business page associated with that name. For example:
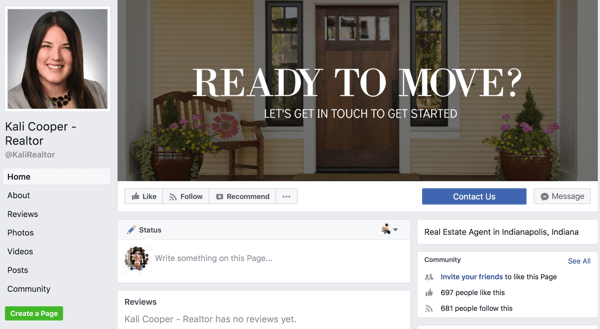
Use a public figure page (which differs from your personal profile) to share professional stories that help people get to know you as a businessperson, not as a friend. For example, you might share 1-minute “why” videos (discussed later in the article) about events that have shaped you, what you believe in, etc.
How Do I Use a Public Figure Page in Concert With My Business Page?
From your public figure page, boost 1-minute videos that align with the mission of your business and help people understand your why. Viewers who buy into your mission or why are likely to consume more personal stories, customer interviews, articles, and blog posts that demonstrate your expertise.
Provided you have your custom audiences set up correctly, you can then remarket to those viewers via ads from your business page that promote your products and services.
Now let’s look at how to set up and use a public figure page to build your brand.
#1: Create Your Public Figure Page
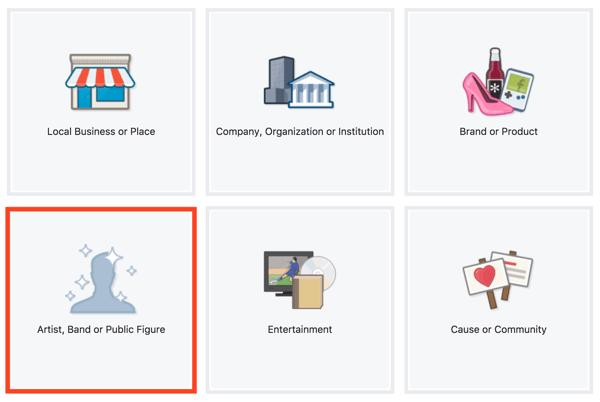
To create your page, go to Facebook’s page creator and select Artist, Band, or Public Figure.
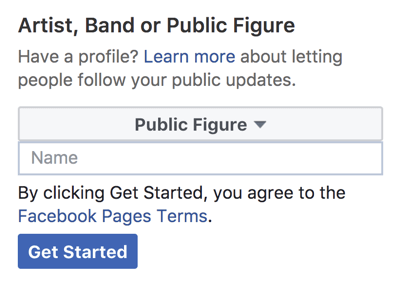
Next, select Public Figure from the Category drop-down menu, type in your name, and click Get Started.
Your new public figure page then appears.
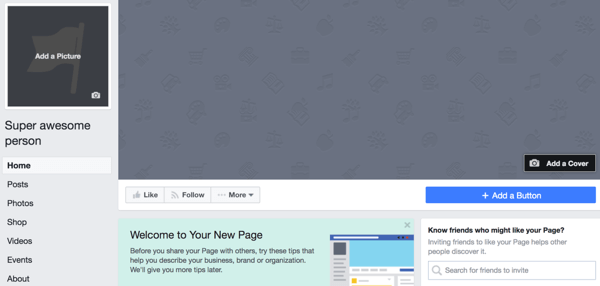
In the upper-left corner of the page, click Add a Picture to upload a professional-looking headshot. You want to choose a high-quality image to represent who you are online, so consider hiring a professional photographer to take your photo. You can use this photo as your profile picture across all of your platforms.
Next, click Add a Cover to upload a cover photo or cover video.

#2: Connect Your Page and Ad Account to Business Manager
Follow these steps to claim your page in Business Manager (and set up a corresponding ad account) so you can start boosting posts and running ads.
Create a Business Manager Account
You need a Business Manager account, so create one if you don’t have one already. Log into the Facebook account you used to make your public figure page and go to https://business.facebook.com.
Next, click Create Account and enter your business name.
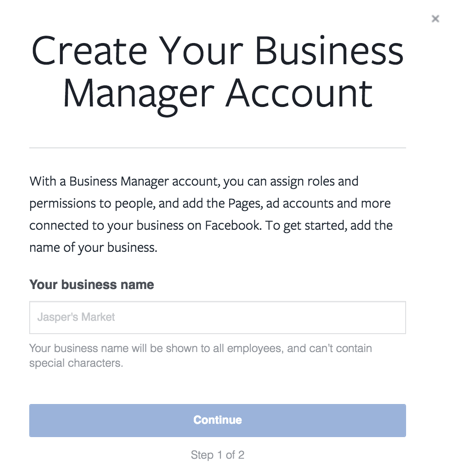
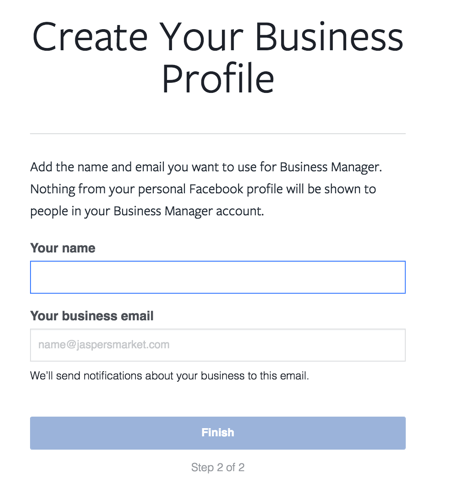
Then type in the name you want to use for Business Manager and your business email for notifications. Click Finish to create your account.
Claim Your Page
Now you need to claim the public figure page you just created. Log into Business Manager and click Business Settings.
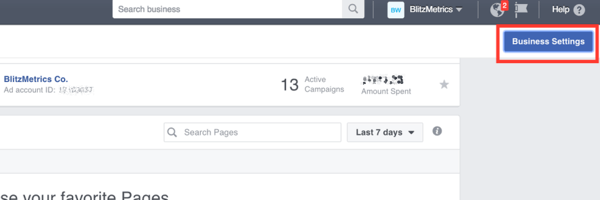
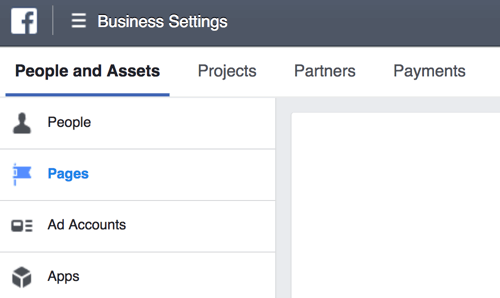
On the People and Assets tab, click Pages in the left menu.
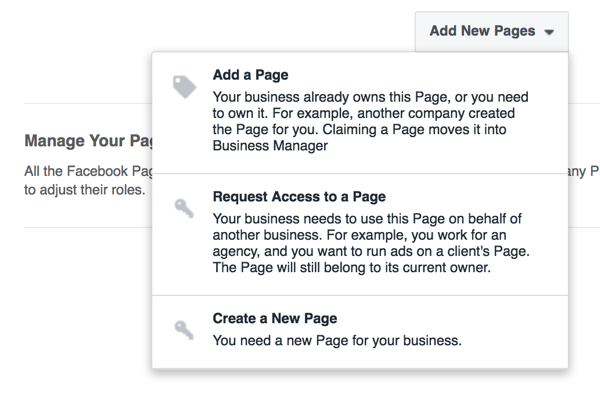
Click Add New Pages and choose Add a Page from the drop-down menu.
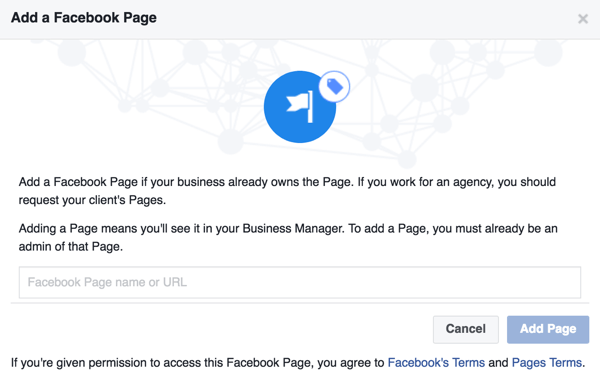
Type in the name of your page or URL, and click Add Page.
Great! You’ve claimed your page.

Set Up an Ad Account
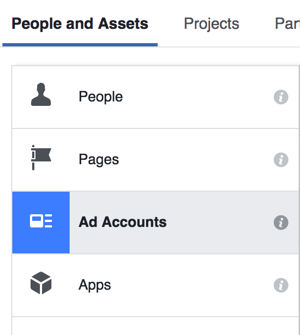
Next, you need to create an ad account to start running ads. In your Business Settings, click Ad Accounts on the People and Assets tab.
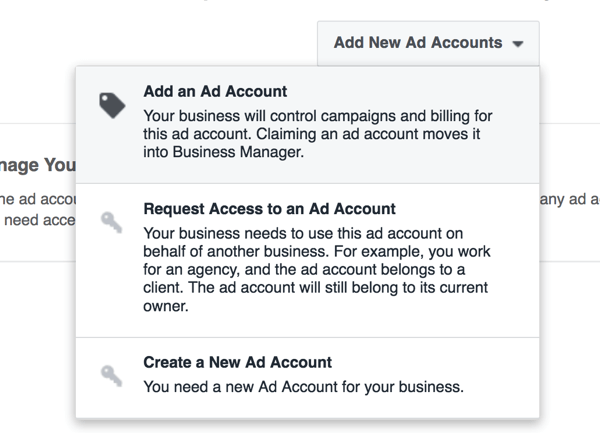
If this is your first ad account, you’ll see a page that prompts you to claim, request access, or create an ad account. Click Create a New Ad Account.
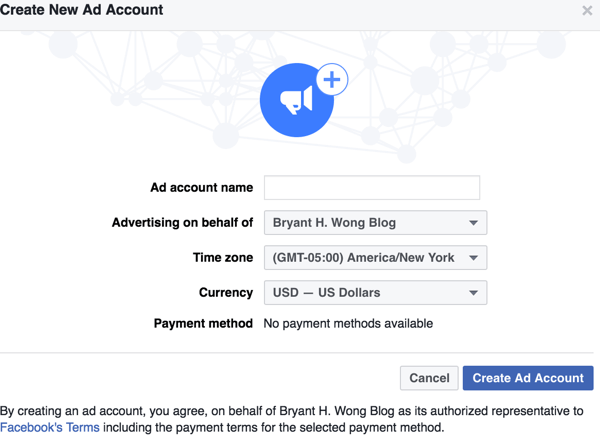
Enter your information and click Create Ad Account.
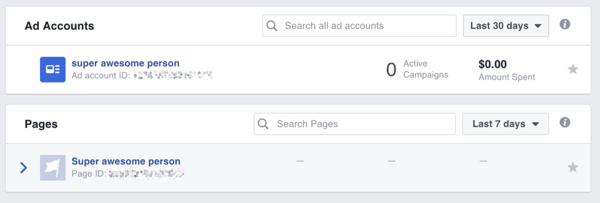
After you create your ad account, go to Business Manager and you should be able to access both your ad account and claimed page.
#3: Install the Facebook Pixel on Your Website
The Facebook pixel is a piece of code that you install on your website so you can track audience activity and ad results.
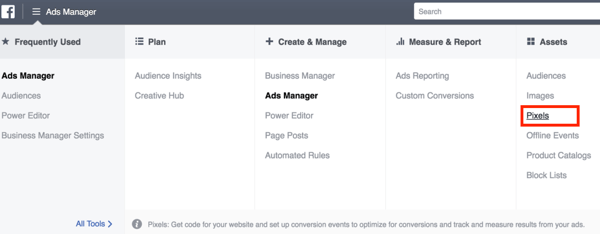
To install the pixel, go to the Ads Manager and select Pixels from the Assets column.
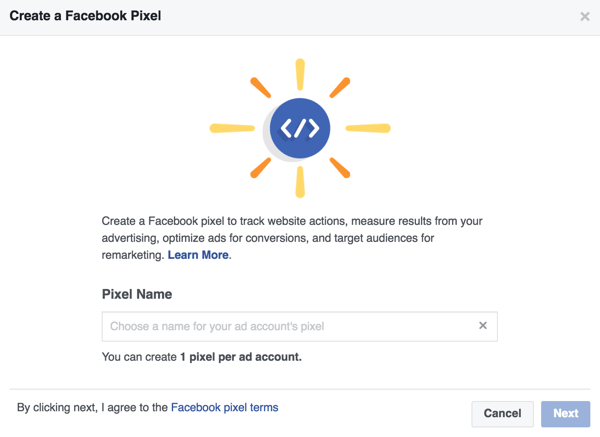
On the next page, click Create a Pixel. Enter a name for your pixel and click Next.
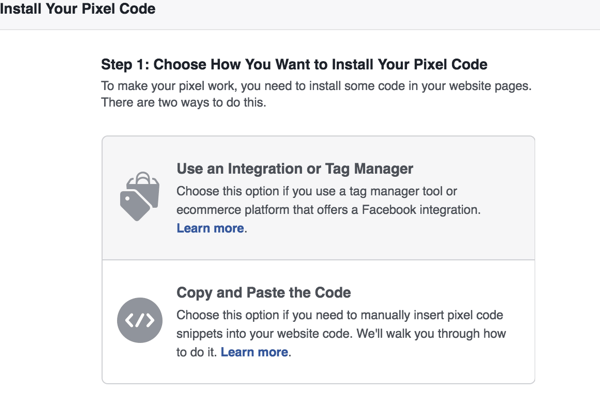
Now choose how you want to install your pixel code. You can either use a tag manager tool that supports a Facebook integration, or copy and paste the code to your website.
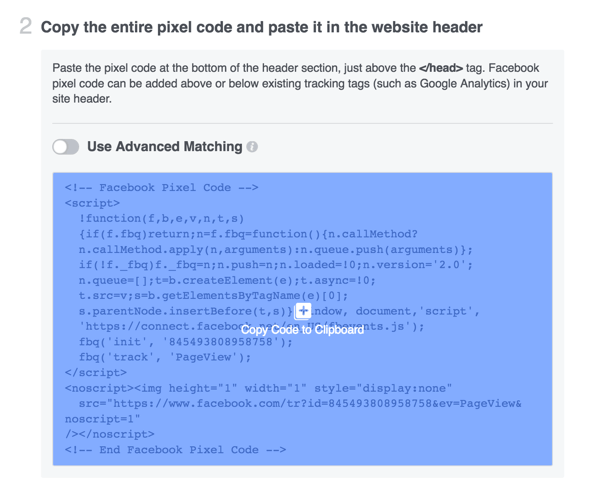
If you’re manually installing the pixel, the next screen lets you copy the required code. Just click in the code box to copy it. From here, insert the code in the header tags of your website.
Once you’ve set up the pixel, it will track activity from your website or app so you can retarget website visitors. You can also determine if your Facebook ads are driving conversions.
#4: Build Credibility With Your Content
Now that you have your public figure page set up, it’s time to start publishing content that demonstrates your expertise.
Produce a “Why” Video
Create a “why” video that explains your mission and what experiences led you to it. If people know what you stand for, they’ll be more likely to follow you.
You don’t need fancy editing software or a high-quality camera to record your video. Just take out your smartphone and start recording. If you need help finding your “why,” check out these examples or look at Simon Sinek’s TED talk.
Collect Endorsements
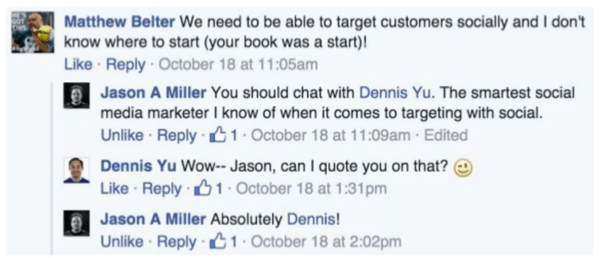
If people say something positive about you online, ask if you can quote them. Use these endorsements as testimonials on your website and landing pages.
Interview Thought Leaders
Ask thought leaders and influencers in your industry for quotes that you can use in your content to build authority. If you’re a frequent commenter and good community member, influencers will usually say yes to a quote.
#5: Amplify Your Reach With Paid Ads
Now that you have content that’s working, show it off! You can use a variety of methods to boost your posts and help you reach your goals (attract an audience, increase engagement, or drive conversions).
Dollar-a-Day Ads
When you have a post that’s getting tons of likes, engagement, etc., boost that post for a dollar a day. This lets you see what content can scale without breaking the bank.
In the Ads Manager, click Create Campaign and choose the objective for your campaign.
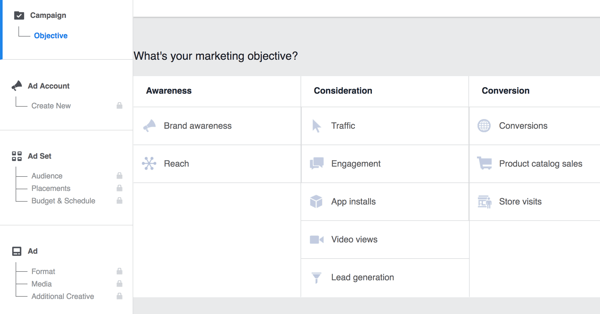
Follow the prompts to choose an audience, placement, budget, and schedule.
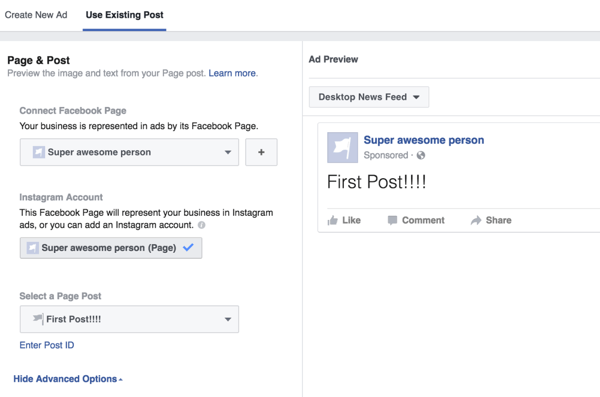
When you get to the ad itself, choose Use Existing Post and select the post you want to boost.
Remarket to Custom Audiences
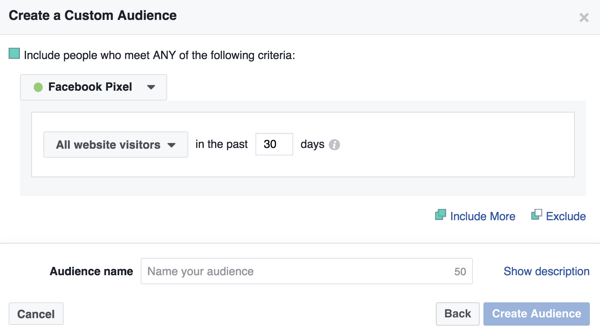
Use custom audiences to retarget people who have visited your website or engaged with your post. Because this is a warm audience, it won’t take much to get people to take action. Keep in mind you’ll need to have the pixel installed on your website.
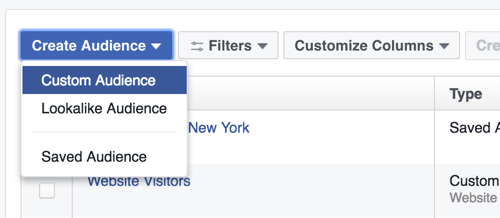
To create a custom audience, go to the Audiences section of the Ads Manager. Then choose Custom Audience from the Create Audience drop-down list.
Next, choose how you want to create your custom audience. If you want to create a custom audience based on website activity, for example, choose Website Traffic.
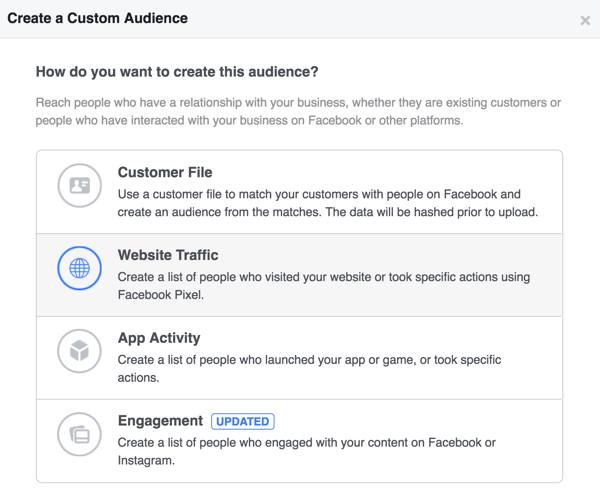
Then fill in the details for your custom audience and click Create Audience.
Cross-Post Videos to Multiple Pages to Extend Your Reach
Cross-posting allows you to post or repost your videos to multiple Facebook pages without re-uploading. This allows you to retain all of your video views, likes, and comments when reposting.
To enable this feature, go to your page, click Settings, and select Crossposting in the left column. Then enter the URL of the page for which you want to establish a cross-posting relationship.

The other page will also need to follow these same steps to allow the cross-posting relationship.
After you establish the cross-posting relationship, you can allow the other page to cross-post your videos. When you upload a video to a new post, click the Crossposting tab and select the options to allow the other page to cross-post the video.
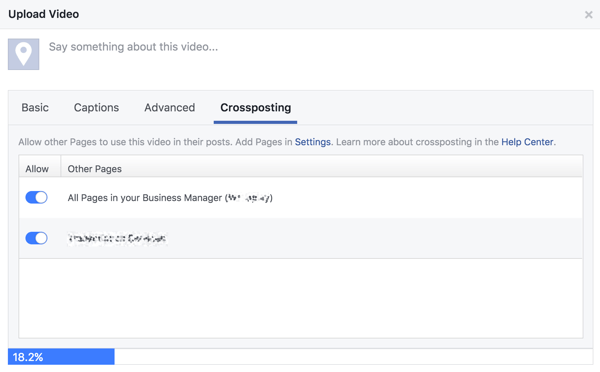
You can also go to your video library in Publishing Tools to choose which videos to allow cross-posting.
You’ll be able to see insights for all of the posts in which your video has been used. Other pages that cross-post your video can see insights only for the video post on their page.
Conclusion
A public figure page is a great way to grow your personal brand and offers many benefits over a personal profile, including the ability to run ads and collect leads. Remember, with a personal branding page, you don’t need to have a product to sell but you do need to publish good content.
What do you think? Do you have a public-figure Facebook page? How do you promote your personal brand on Facebook? Share your thoughts in the comments below.